
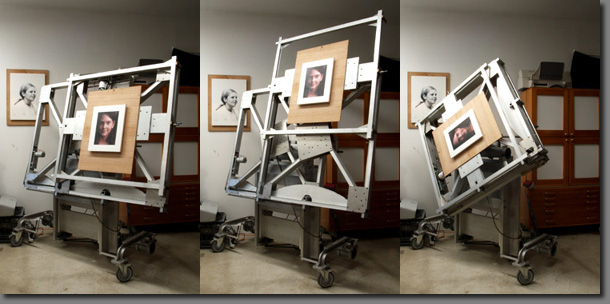

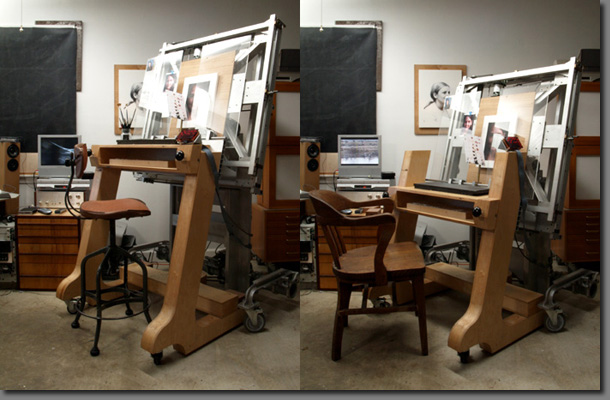
For good or ill, I paint close to my work with small brushes. I found it much easier both for the process and for my body to bring the area of interest to a standard working position. To this end I designed the easel with a motorized XY positioning system with 3 of motion. I also found it is often convenient to rotate the painting to facilitate work on certain passages, so I designed the easel to rotate 360 degrees. I work on a high drafting chair or standing so I have the easel set high. However I wanted the option to work at a lower position so I incorporated a feature to raise and lower the whole thing.

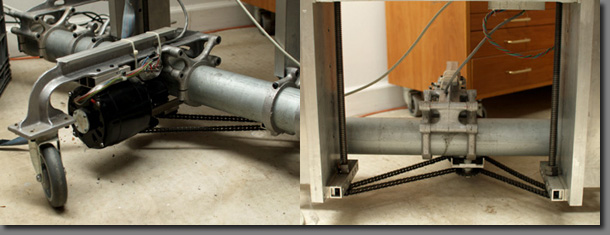
This is the gear motor and chain that drive dual jackscrews for the elevating mechanism.

I took up painting without the hubris of assuming I would make money at it so I feel it is incumbent on me that I spend as little as possible on it. This does not mean I economize on paint, brushes or the materials that actually go into the work but it does mean that I scrounge, salvage, enlist or build as many of the tools for the painting process as possible. Keeping costs down was paramount in the easels design. The entire project would have been impractical without the Aluminum extrusions that I used for most structural elements. I got them as free surplus from a university physics experiment. They are essentially aluminum boards 12 long 8 wide 1 thick. In section they have 8 cells 1 square. The metal is 1/16 inch thick. They have an incredible strength/weight ratio and because the metal itself is thin it can easily be cut with woodworking tools.
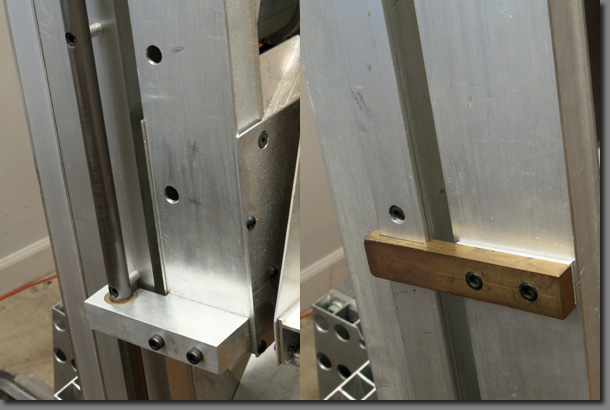
There are many off the shelf linear track and bearing systems available that have low friction and high wear resistance. But the cost of one of these systems could have easily been as much as I spent on the entire easel. I built my tracks out of inexpensive centerless ground drill rod, and the bearings out of fifty cent bronze sleeve bearings mounted in aluminum blocks. The rod on one side controls motion in two dimensions so on the opposite side I used an even simpler system consisting of an aluminum bar track with notched brass bearing blocks.

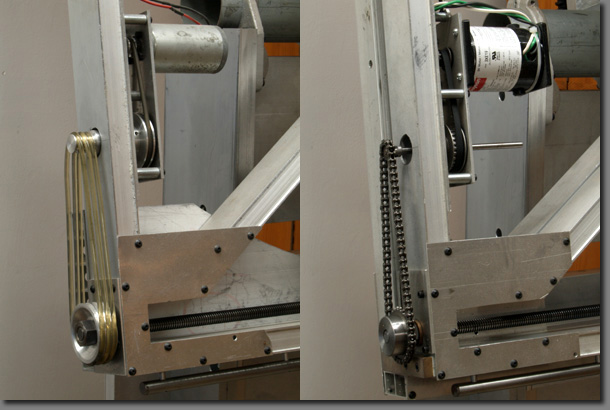
Similarly the original XY motor drive had to be low cost using scrounged motors. I came up with the system on the left below. The only expense was the urethane belts. I turned the pullies out of aluminum bar stock. It is a common misconception that you need a sophisticated engine lathe to turn metal. It reality metal, even steel can be turned with a simple lathe using hand held tools in the manner of woodturning. This drive system works OK but it is slow and even with three belts in the final drive belt slippage is a problem. The drive was unable to elevate all but the smallest paintings without manual assist. When circumstances allowed I replaced the primarily Y drive with the system on the right. With a purchased motor, a cogged timing belt primary drive and chain secondary drive it can elevate 50 lbs. and is much faster. I still use the old system on the primarily X-axis but hope to convert it someday as well.

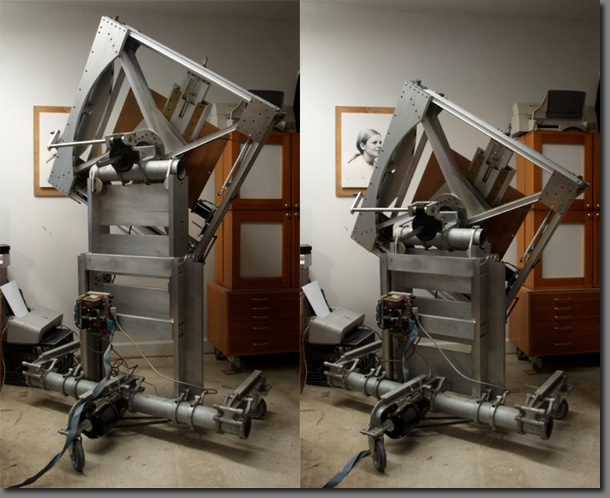
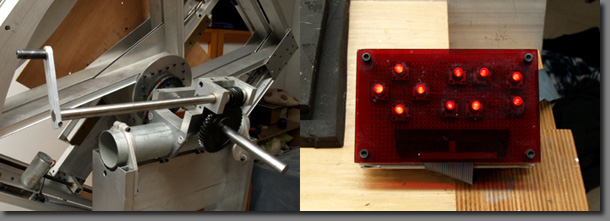
One design element I resisted because of the cost was the big cranked worm gear to rotate the thing. After a less than satisfactory motor drive I broke down and bought the gear set for $125. Do to he nature their design and the high gear ratio, in this case 40 to 1 the worm can turn the gear but the gear cant turn the worm so it acts as its own break, even with a heavy painting is at the maximum off axis position.
Keeping with the low cost theme the control panel was constructed from bits on hand. The motions are activated by circuit board tac switches like those behind the front panels of audio and video equipment. The actuators are standard light emitting diodes protruding through holes in red Plexiglas.
The most cost effective structural parts are aluminum castings. They are beautiful as well.
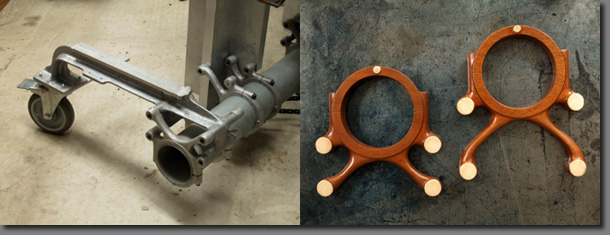
All you do is make a slightly larger version of what you want out of wood. Pack a mixture of damp sand and clay around the wood pattern, remove the pattern, melt some aluminum, pour it into the void, let it solidify, pull your part from the sand, rinse and repeat. Any kind of aluminum scrap can be used. I used cutoffs, wire, old pistons. I even used a couple alloy automobile wheels. I particularly liked the two parts whose patterns I show here. I named the tall one Molly and the short one Sammy. They provide a means of connecting structural elements to the 3 1/2" steel electrical conduit I used as a basic structural element. This scheme allowed for a strong and rigid yet imaginatively flexible design.
While I dont have access to a machine shop and most of the easel was built with woodworking tools, there were certain tasks that would have been difficult without metalworking equipment. Luckily in one of the dark recesses of the warehouse where I rented shop space there was this old Atlas milling machine. Built mostly in the pre WWII years in Kalamazoo MI. Thousands of these little beasts were sold to small shops and hobbyists. This one was a useless rusted wreck when I found it so I dismantled it and rebuilt it from the ground up. I hand scraped all sliding surfaces bringing it to a level of precision that it did not even posses when new. Rather than finish it in its original gray paint I rechristened it my Little Red Machine.
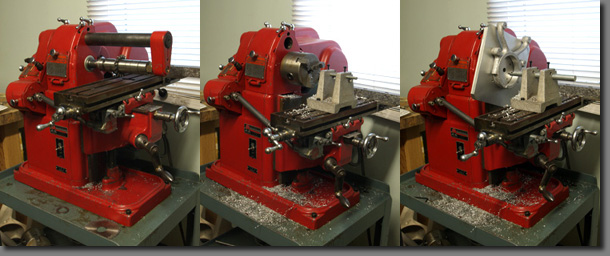
While ostensibly a horizontal mill (left image) where saw like cutters mill material fixed to the XYZ table. The head is has all the features of a lathe head including a standard chuck thread, Morse taper headstock, hollow spindle and back gears. This made it possible torture it into performing all of the machine tasks necessary to build the easel. I got a cheap 3 jaw chuck (middle image), and made a face plate that I could use to bore Molly, Sammy and their siblings. (right image)
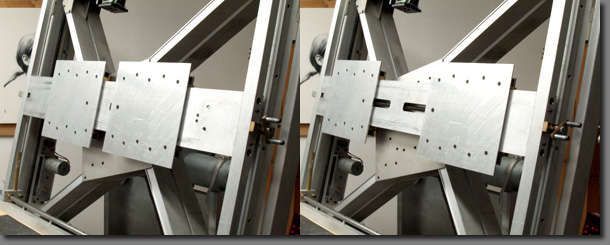
To hold the paintings on the easel I constructed a self-centering clamp. The aluminum plates have beveled edges and are moved with the crank on the right.

To the back of each painting I mount four permanent spacers with a integrated threaded fasteners. The top ones have a beveled bottom edge to facilitate hanging. They also provide a means to bolt the panel to a temporary plywood panel. I paint all six planes of my paintings so I make the panel oversize to protect the painting while in progress and make it unnecessary to touch the painting itself when handling it. To the back of the temporary panel I mount a smaller panel with beveled sides that dovetails with the clamp. The painting is held securely to the easel but is instantly removable. .
